
The ultimate oil pressure guide for the TFSI 2.0 EA113
TFSI 2.0 EA113 Oil pressure – Part 3
At last I have found some time to get back to writing again. I’m well aware that the previous two posts didn’t really contain any big surprises or secrets. This time around however, I’m extra excited writing this third part of the series. Now it will get a bit more interesting. Today we will be taking a closer look at the 2.0 TFSI EA113 Oil pump and balance shaft assembly.
Balance shaft module removal
At this point it is time to remove the complete balance shaft module, also containing the oil pump. This is a simple job which can be performed by anyone who got this far. The first thing you will want to do is securing the chain tensioner with a locking pin. In some cases the plastic will be brittle causing the loops to break. If it happens, don’t worry about it, the tensioner will still be working if you want to reuse it. Now remove the oil pump sprocket, using the correct torx drive bit. And that is all. You can now remove the bolts holding the module to the engine block and take it out.
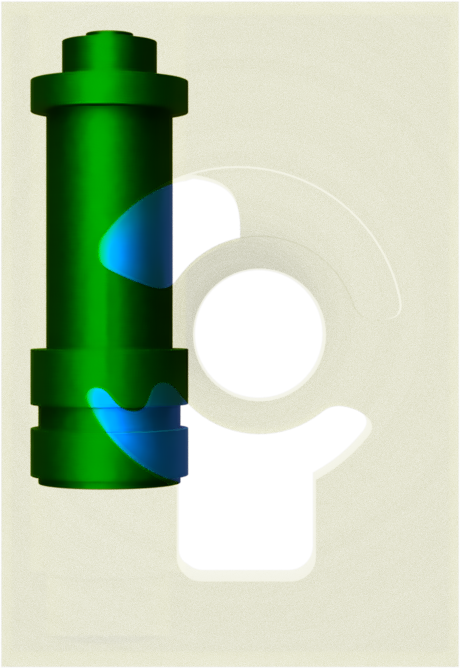
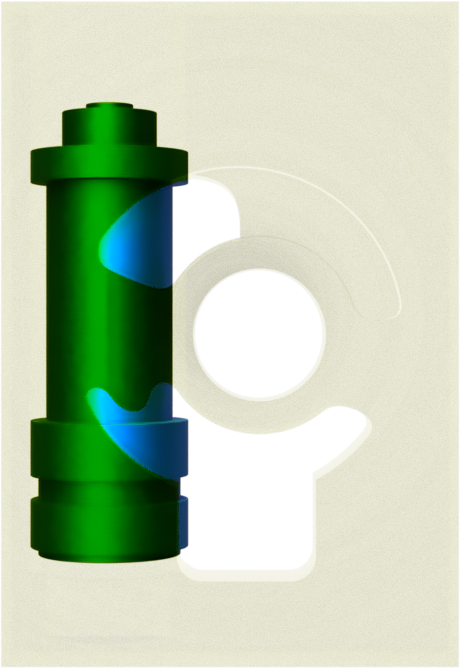
The balance shaft module
Whenever mentioned in a context of failure prone components, thoughts immediately go to the sprocket driving the balance shafts. Even though this is a very common issue, it is far from the only one.
Now that we have our module removed from the Engine, let’s take a closer look at what we have. Starting with the exterior and then moving on to the interior parts.
The balance shaft sprocket – again
Even though this was checked and partly covered in the previous post, I recommend to double check it. Now you have better access to it and probably better lighting. Better safe than sorry, right? What you need to make sure of is that the sprocket is centered and not already cracked. Another thing to take a look at, is the position of the sprocket. When the weights of the shafts are positioned downwards, flat sides linear to each other. The mark on the sprocket must be aligned with the hole for the locking tool. If all this is OK, we move on to the next step. I myself, would recommend reinstalling the module with the OEM sprocket. But that is up to you to decide for yourselves.
The shafts and journals
This is also an issue known to most people, that needs to be checked when dealing with low oil pressure. In the rear end of the module you will see the ends of the balance shafts protruding. If these journals get worn out it will create play in the shafts resulting in loss of oil pressure. Now, we get a lot of calls from people who are unsure what would be excessive play. Truth to be told is that this issue is not all that common. In most cases you will know right away if it is too much. By design they obviously are in need of some space for the oil film. The same film will amplify the Visual effect of the overall journal play. This is what the worried people see when wiggling the shafts back and forth.
The oil pump
The next step requires you to remove the lid of the oil pump. This is done by unscrewing the five allen head bolts holding it.
We have seen claims on the internet, both in forums as well as on competitors websites, that the TFSI 2.0 oil pump is somehow undersized for its job. They could not be more wrong. A good example for this is a rather embarrassing story about a module fixed by us for a customer.
In this particular case we had installed our oil pressure regulating fix and sent the pump back. However we did a crucial mistake during the modification. The customer called us, after he had reinstalled the unit and fired up the car. He kindly let us know the engine now holds an oil pressure of 13,5 bar (!). As I said, very embarrassing. But hey, even at the fine company of Wasa Motor, we are only human. The important lesson to be learned here, is that the TFSI 2.0 oil pump is very much capable of delivering all the oil you’ll ever need.
With a pump this oversized, it is very rare to find the solution to fixing low oil pressure here. Still, it does not hurt to check while you are at it. What you are looking for here are really badly damaged inner and outer rotors. Also the lid may be damaged.
The oil pressure regulating system
For the first time in this blog series, we will now have a look into something all new. You will not find it anywhere else on the internet. Why you ask? Because looking at some of the newer designs from Audi, it seems they have not even figured it out themselves yet.
The TFSI 2.0 EA113 oil pump has an integrated regulating system which is designed rather careless, resulting in issues of holding the oil pressure. The issues may present themselves in a number of different ways, ranging from low oil pressure during specific circumstances to seemingly sporadic flashing pressure warnings.
In order to troubleshoot the issues brought on by a faulty regulating system, it is important to understand how it is operating and where the engineers went wrong.
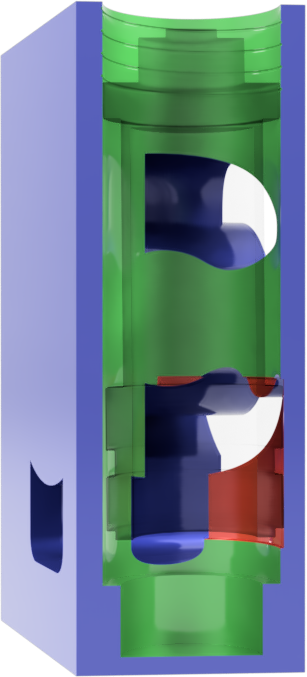
To help you with this I have made a quick (somewhat accurate) 3D model of the components, to help better visualize the design.

The oil pressure regulating system of the 2.0 TFSI EA113 Engine
The red part is a cutout of the balance shaft and oil pump assembly.
As you can see in the picture above, the oil pressure is regulated by a spring loaded piston. At the bottom is the intake port, connecting oil pump and pickup tube, whilst the upper port is the pressure side, from where the oil is being distributed on to the engine.
Low oil pump RPM
This image shows the regulating piston in its “resting” position. As you can see only the outlet side port is open, allowing maximum oil pressure produced by the pump, at the current RPM.
Higher oil pump RPM
This image shows the oil pump ports under a higher engine RPM, also causing the oil pump sending more, thus creating a higher pressure. When the pressure builds up to a certain point, it will force the piston downwards, connecting the ports and recirculating som of the oil to the inlet of the pump.
The problems with this system, start when you get an unwanted connection between the inlet and outlet port. Unfortunately this happens a lot due to the poor engineering within, the biggest mistake being that the ports are located on the same side of the piston bore. This causes bias to the piston and results in accelerated wear in the bore.
Visualization of a worn piston bore
The area highlighted in red is part that will typically be most affected by wear. On the opposite side a small gap between piston and bore can be seen.
The gap in the picture may not seem all that bad at first look. But considering a diametral wear of 0,35 millimeters, equals an area of 8 mm² for the oil to leak past the piston, it really is not that insignificant.
To make matters even worse, this is still not the main problem here. The real trouble is the ridge created just below where the port would normally close. Because of the suction from the oil pump, the piston will catch on that ridge and remain in the semi opened location. Now you have an 8 mm² leak as well as a slightly open port to worry about.
At this point the engines oil pressure guard is likely to take notice at idle.
When combining this with an overall-not-brand-new engine it will be even further accentuated.
So that is the first issue. But don’t worry, we will dive even further into it.
the effect of the different pickup tube types
As you may recall from the previous post, I mentioned the two different types of oil pickup tube, also known as oil suction pipe.
Let’s start out with the first version without the bypass. The first thing people tend to check, apart from the balance shaft sprocket, is whether there is a blockage in the pickup screen. Could be oil sludge or some sort of debris. What you must also take into account here, is the effect this restriction has on the regulating system. Of course a blocked screen will Always have a negative effect, but in the TFSI 2.0 EA113 it seldom causes total cutoff to the oil supply. I can almost hear people Reading this, shouting at me that I couldn’t be more wrong, but hear me out, please.
What actually happens when your screen gets partly choked, is that vacuum is created between the screen and the intake port of the oil pump. This channel is directly connected to the pressure regulating chamber, causing the piston to be sucked down and short the oil pump. And voila, no oil pressure.
This won’t happen with the other type of suction pipe, due to the bypass valve. The downside with this “fix”, is that the same regulating system is extremely sensitive to small particles. The bypass valve has no screen and increases the risk of debris getting in to the system and being wedged between the anodized aluminium piston and the untreated aluminium bore. This could once again lead to the piston being stuck in the open position.
Don’t worry, we have a solution to this problem
Wow, this post is getting long. I Think this is a good Point for a break. I will keep on typing in a bit, but for the ease of Reading, I will break it up into a new part of the ultimate oil pressure guide for the TFSI 2.0 EA113.
So, I’ll see you in part 4.